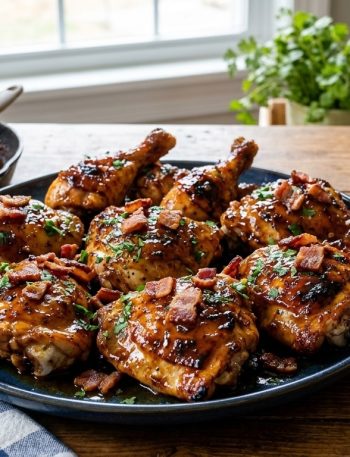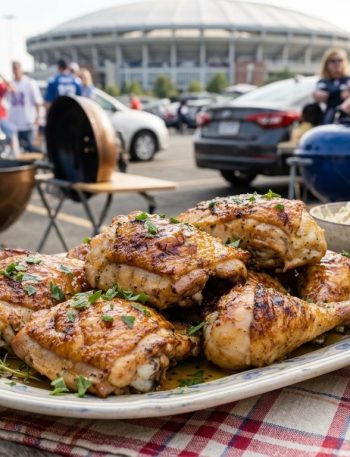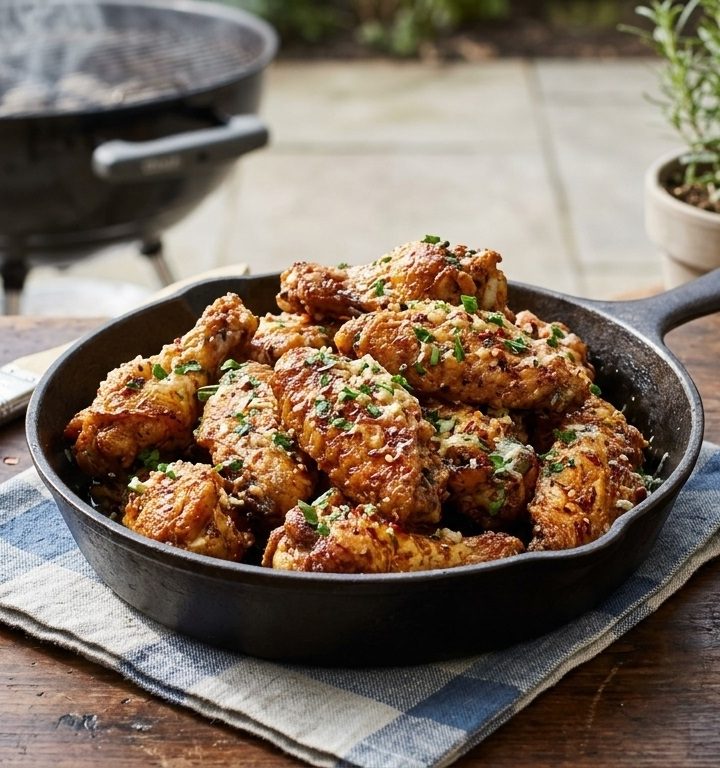
Achieving deep-fried crunch without using a commercial deep fryer is the ultimate goal when making homemade wings. While standard oven-baking often results in rubbery skin or dried-out meat, Crispy Baked Garlic Butter Chicken Wings leverage basic food chemistry—specifically surface pH manipulation and dual-temperature convection roasting—to deliver a blistered, golden-brown crust. Once baked to perfection, these wings are tossed in a rich, velvety garlic butter emulsion spiked with freshly grated Parmesan cheese and herbs.
In this comprehensive 1,500-word culinary guide, you will master the art of making Crispy Baked Garlic Butter Chicken Wings completely from scratch. We will cover the mechanics of baking powder crisping, skin dehydration science, butter-garlic emulsification, ideal side dish pairings, and complete nutritional facts.
The Science of Oven-Crisped Chicken Skin
Unlocking maximum crispiness in a conventional home oven comes down to managing surface moisture and accelerating structural skin breakdown.
1. Baking Powder & Surface pH Modification
Aluminum-free baking powder (sodium bicarbonate) is the secret weapon for oven-baked wings. Baking powder slightly raises the pH level on the chicken skin. This alkaline environment breaks down peptide bonds in the skin proteins, allowing the surface to blister and crisp up rapidly under oven heat.
2. Moisture Evaporation & Rendered Fat
Water is the enemy of crispiness. Searing or roasting wet chicken creates steam, resulting in soft, chewy skin. By combining a salt-and-baking-powder dry rub with an uncovered room-temperature or refrigerated rest, surface moisture evaporates completely. As the wings bake, rendering fat bubbles through this micro-blistered surface to fry the skin in its own natural oils.
Why You Will Love Crispy Baked Garlic Butter Chicken Wings
- No Deep Fryer Mess: All the crunch of classic fried wings with minimal oil splatters and easy pan cleanup.
- Insanely Crispy Texture: Baking powder science yields a micro-blistered shell that stays crunchy even after being tossed in sauce.
- Rich Garlic Butter Glaze: Silky, aromatic garlic butter clings perfectly to every crack and crevice.
- Keto & Gluten-Free Friendly: Naturally low in carbohydrates when using aluminum-free baking powder instead of flour or cornstarch.
Essential Kitchen Equipment for Crispy Baked Garlic Butter Chicken Wings
Gather these fundamental tools before starting your Crispy Baked Garlic Butter Chicken Wings:
- Rimmed Heavy Baking Sheet: Captures rendering fat while distributing heat evenly across the pan.
- Oven-Safe Oven Wire Cooling Rack: Crucial for elevating wings so hot air circulates underneath, preventing soggy bottoms.
- Large Stainless Steel Mixing Bowl: Allows plenty of room to toss hot wings in garlic butter without crushing them.
- Paper Towels: Essential for blotting away all surface moisture prior to seasoning.
- Silicon Basting Brush or Tongs: For turning wings cleanly mid-bake.
Key Ingredients for Crispy Baked Garlic Butter Chicken Wings
Gather these fresh staples and kitchen essentials:
1. Main Poultry Base
- 3 lbs fresh chicken wings (flats and drumettes separated, wing tips removed).
2. The Science Dry Rub (Crisping Agent)
- 1 tablespoon aluminum-free baking powder (not baking soda).
- 1 teaspoon coarse kosher salt.
- 1/2 teaspoon garlic powder.
- 1/2 teaspoon cracked black pepper.
3. Rich Garlic Butter Sauce & Garnish
- 4 tablespoons (1/2 stick) unsalted butter, melted.
- 5 cloves fresh garlic, extremely finely minced or microplaned.
- 1/3 cup freshly grated Parmesan cheese (block Parmesan yields smooth melting).
- 2 tablespoons fresh Italian parsley, finely chopped.
- 1/4 teaspoon red pepper flakes (optional, for subtle warmth).
you can cook this recipe by using this item

Step-by-Step Culinary Breakdown
Step 1: Thoroughly Dry the Wings
Pat the separated wing flats and drumettes completely dry using double-layered paper towels. Take your time with this step—removing all moisture is mandatory for achieving maximum skin crispness.
Step 2: Apply the Baking Powder Dry Rub
In a small bowl, whisk together the aluminum-free baking powder, kosher salt, garlic powder, and black pepper. Place the dry wings into a large zip-top bag or bowl, sprinkle the baking powder mixture over top, and toss until every wing is lightly coated in a fine, even layer.
Step 3: Air-Dry Rest (Optional but Recommended)
For absolute peak crunch, line your baking sheet with foil and set an oven-safe wire rack on top. Lightly spray the rack with cooking oil. Arrange the seasoned wings on the rack in a single layer, leaving space between each piece. Refrigerate uncovered for 1 to 4 hours to dehydrate the skin. (If short on time, proceed directly to baking).
Step 4: Dual-Temperature Oven Bake
Position your oven rack in the upper-middle slot and preheat the oven to 250°F (120°C). Bake wings at this low temperature for 20 minutes. This initial low-heat phase gently renders out underlying subcutaneous fat without burning the skin.
Without removing the pan, increase the oven temperature to 425°F (220°C). Bake for an additional 30 to 35 minutes, flipping the wings halfway through, until the skin turns deeply golden-brown, blistered, and thoroughly crisp.
Step 5: Emulsify Garlic Butter & Toss
While the wings complete their high-heat crisp, melt the butter in a small saucepan over medium-low heat. Add the finely minced garlic and red pepper flakes, cooking for 1 minute until fragrant (do not let the garlic brown). Remove from heat. Place hot wings directly from the oven into a warm mixing bowl, pour over the garlic butter, sprinkle with fresh Parmesan cheese and parsley, and toss vigorously until well coated. Serve immediately!
Oven Baking Time & Temperature Matrix for Crispy Baked Garlic Butter Chicken Wings
| Baking Phase | Oven Temp | Duration | Primary Culinary Objective |
| Phase 1: Fat Render | 250°F (120°C) | 20 Minutes | Renders subcutaneous fat gently |
| Phase 2: High Crisp | 425°F (220°C) | 30–35 Minutes | Blisters skin & crisps baking powder crust |
| Air Fryer Alternative | 380°F $\rightarrow$ 400°F | 20 Mins $\rightarrow$ 5 Mins | Rapid convection crisping in small batches |
7 Secret Tips for Perfect Crispy Baked Garlic Butter Chicken Wings
- Use Aluminum-Free Baking Powder Only: Standard baking powder containing sodium aluminum sulfate leaves a metallic bitter taste when baked at high heat. Always check the label.
- Never Substitute Baking Soda: Baking soda is pure sodium bicarbonate and is far too strong; it will ruin the flavor and turn wings soapy.
- Always Bake on an Elevated Wire Rack: Setting wings directly on a flat baking sheet traps rendering fat underneath, steaming the bottoms into a soggy texture.
- Mince Garlic Microplane-Fine: Chopping garlic into large chunks leaves raw, pungent bites. Grating it on a Microplane allows it to melt smoothly into hot butter.
- Toss Wings While Piping Hot: Adding Parmesan cheese to scalding hot wings straight from the oven allows the cheese to melt slightly and adhere into a clingy, rich coating.
- Do Not Overcrowd the Sheet: Leave at least half an inch of space around each wing so hot air circulates evenly for uniform blistering.
- Use Fresh Block Parmesan: Pre-shredded tub cheese contains cellulose anti-caking powders that cause sauce to turn grainy instead of smooth.
Classic Side Dish Pairing Ideas for Crispy Baked Garlic Butter Chicken Wings
Pair these rich Crispy Baked Garlic Butter Chicken Wings with light, refreshing sides:
- Classic Celery & Carrot Sticks: Fresh, crunchy veggie sticks with house-made ranch or blue cheese dressing.
- Tangy Caesar Side Salad: Crisp romaine hearts tossed in a garlic-lemon dressing with toasted croutons.
- Crispy Potato Wedges: Oven-roasted russet potato wedges seasoned with rosemary and sea salt.
- Charred Lemon Wedges: Squeezing fresh hot lemon juice over garlic butter wings cuts through rich fat brilliantly.
Estimated Nutritional Breakdown for Crispy Baked Garlic Butter Chicken Wings
Per Serving (Recipe serves 4 - approx. 6-8 wings per serving):
| Nutrient | Amount | % Daily Value* |
| Calories | 480 kcal | -- |
| Total Fat | 34 g | 44% |
| Saturated Fat | 13 g | 65% |
| Cholesterol | 155 mg | 52% |
| Sodium | 620 mg | 27% |
| Total Carbohydrates | 2 g | 1% |
| Total Sugars | 0 g | -- |
| Protein | 40 g | 80% |
Storage & Reheating Instructions for Crispy Baked Garlic Butter Chicken Wings
- Refrigeration: Store leftover wings in an airtight container lined with a paper towel in the refrigerator for up to 3 to 4 days.
- Reheating for Maximum Crunch: Never microwave leftover wings! Reheat on a wire rack in an oven or air fryer preheated to 400°F (200°C) for 6 to 8 minutes until sizzling and re-crisped.
Frequently Asked Questions about Crispy Baked Garlic Butter Chicken Wings
Can I make these in an Air Fryer instead of an oven?
Yes! Toss dried wings in the baking powder rub. Place in a single layer in your air fryer basket at 380°F (190°C) for 20 minutes (shaking halfway through). Increase heat to 400°F (200°C) for 5 minutes until extra crisp, then toss in garlic butter.
Why didn't my wings get crispy?
Lack of crispiness usually stems from three errors: omitting the baking powder, failing to dry wings thoroughly with paper towels, or baking them directly on a flat sheet pan instead of an elevated wire rack.
Conclusion about Crispy Baked Garlic Butter Chicken Wings
These Crispy Baked Garlic Butter Chicken Wings prove that you don't need gallons of hot oil to enjoy deep-fryer-level crunch at home. By mastering baking powder surface chemistry and two-stage roasting, you enjoy golden, micro-blistered wings coated in aromatic garlic butter every single time!